Construction
(This is part three of the chronicle of my 2013 Retrochallenge Winter Warmup submission. The mediocrity starts here.)
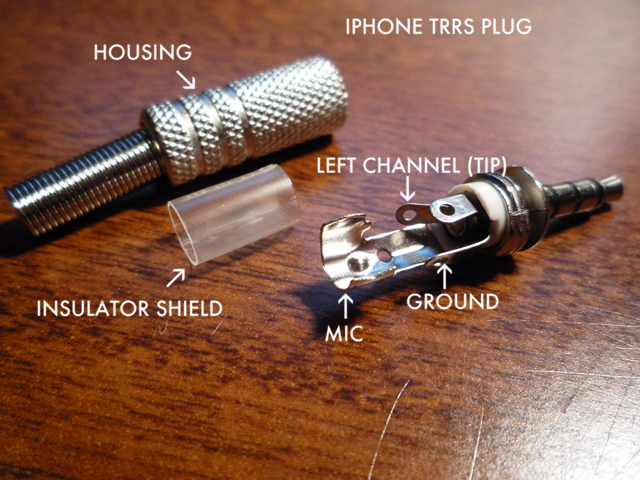
1. iPhone plug (TRRS 4-pole connector)
- Strip 1/8″ (3mm) off both ends of the 4 wires
- Use a digital multimeter to determine the relationship between the plug and posts (where wires will be connected/soldered)
- Solder 1 wire to left channel (tip)
- Skip the right channel (next closest to tip)
- Solder 2 wires to ground (next closest to base)
- Solder 1 wire to mic (base)
- Test connections using digital multimeter (ensure each wire connects to exactly one part of the plug)
- Slide the clear insulator sheath over the solders (to prevent accidental connections to the metal housing)
- Slide the housing over the wires and screw the housing onto the plug
- Test again using digital multimeter to ensure the housing isn’t interfering with the connections

2. Braid Wires
To avoid the 4 wires from becoming unwieldy I wanted some way to bundle the wires together. I thought about purchasing a length of heat shrink tubing but decided it would be simpler to braid or weave them together. I tried searching how to braid 4 strings but could only find references to friendship bracelets. Now that might be pretty cool to weave some retro logos using the wires but life is short. So I decided to do a 3-string braid – treating two of the wires as a single.
For some fleeting moments I had a good rhythm for the braid – until I thought about it. So some sections look like I knew what I was doing and other sections look like I was drunk. 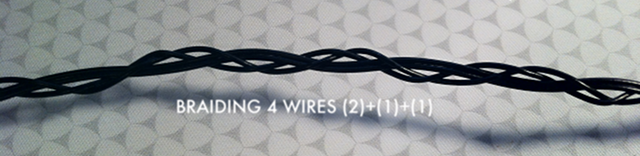
3. Microphone plug
- Solder the mic wire to the tip
- Solder one of the ground wires to the base
4. Line out plug
- Solder the left channel wire to the tip
- Solder the remaining ground wires to the base

